Documentation
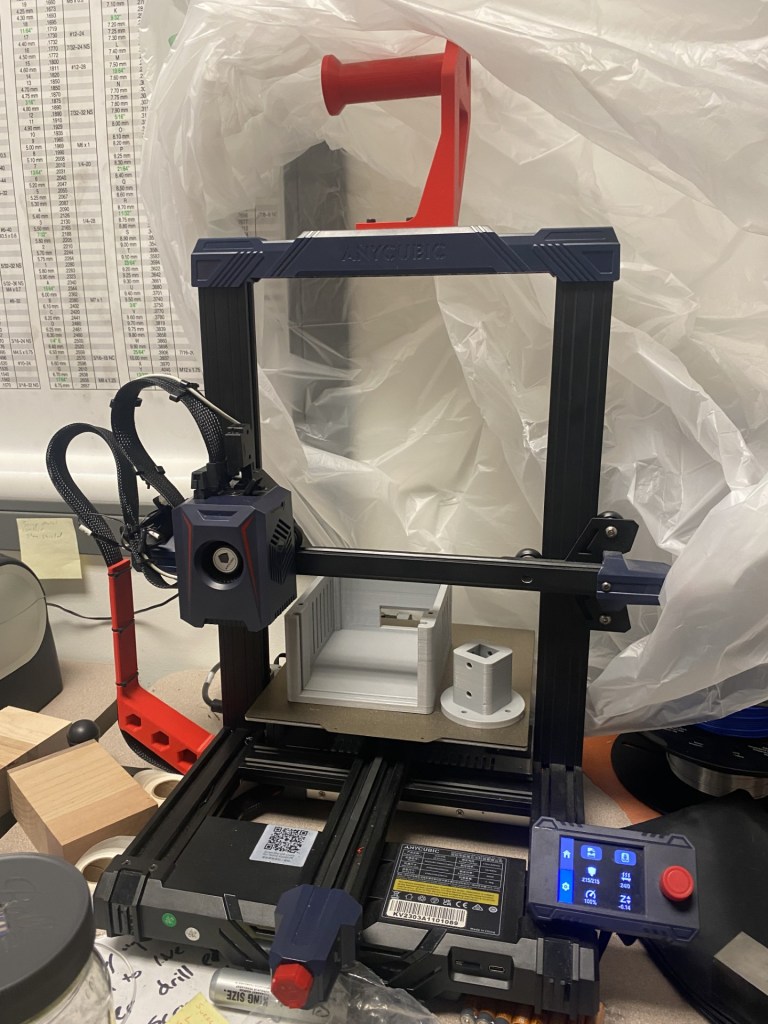
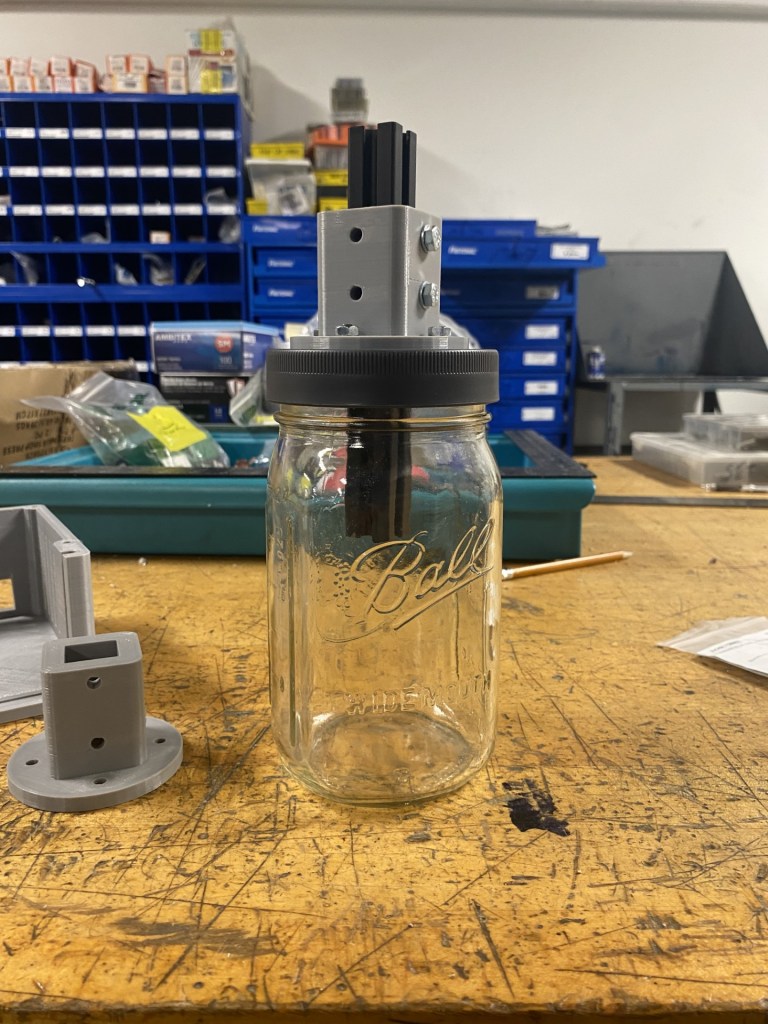
Most of the manufacturing in this project is done an a 3D printer. This has been incredibly convenient for building complex shapes and furthering construction progress without having to be present while the printer is working. Once all printing has been done, the remaining construction will involve assembly and soldering.
One significant advancement that has been made in the manufacturing process was the tuning of the AnyCubuc Kobra 2 Neo printer to use PETG filament. This was previously thought to be a difficult and time-consuming task, but ended up being nearly effortless. Using PETG allows all printed components to have much more strength and longevity than they would’ve had PLA been used, without all the hassle of using ABS filament on Hogue’s more finicky printers.
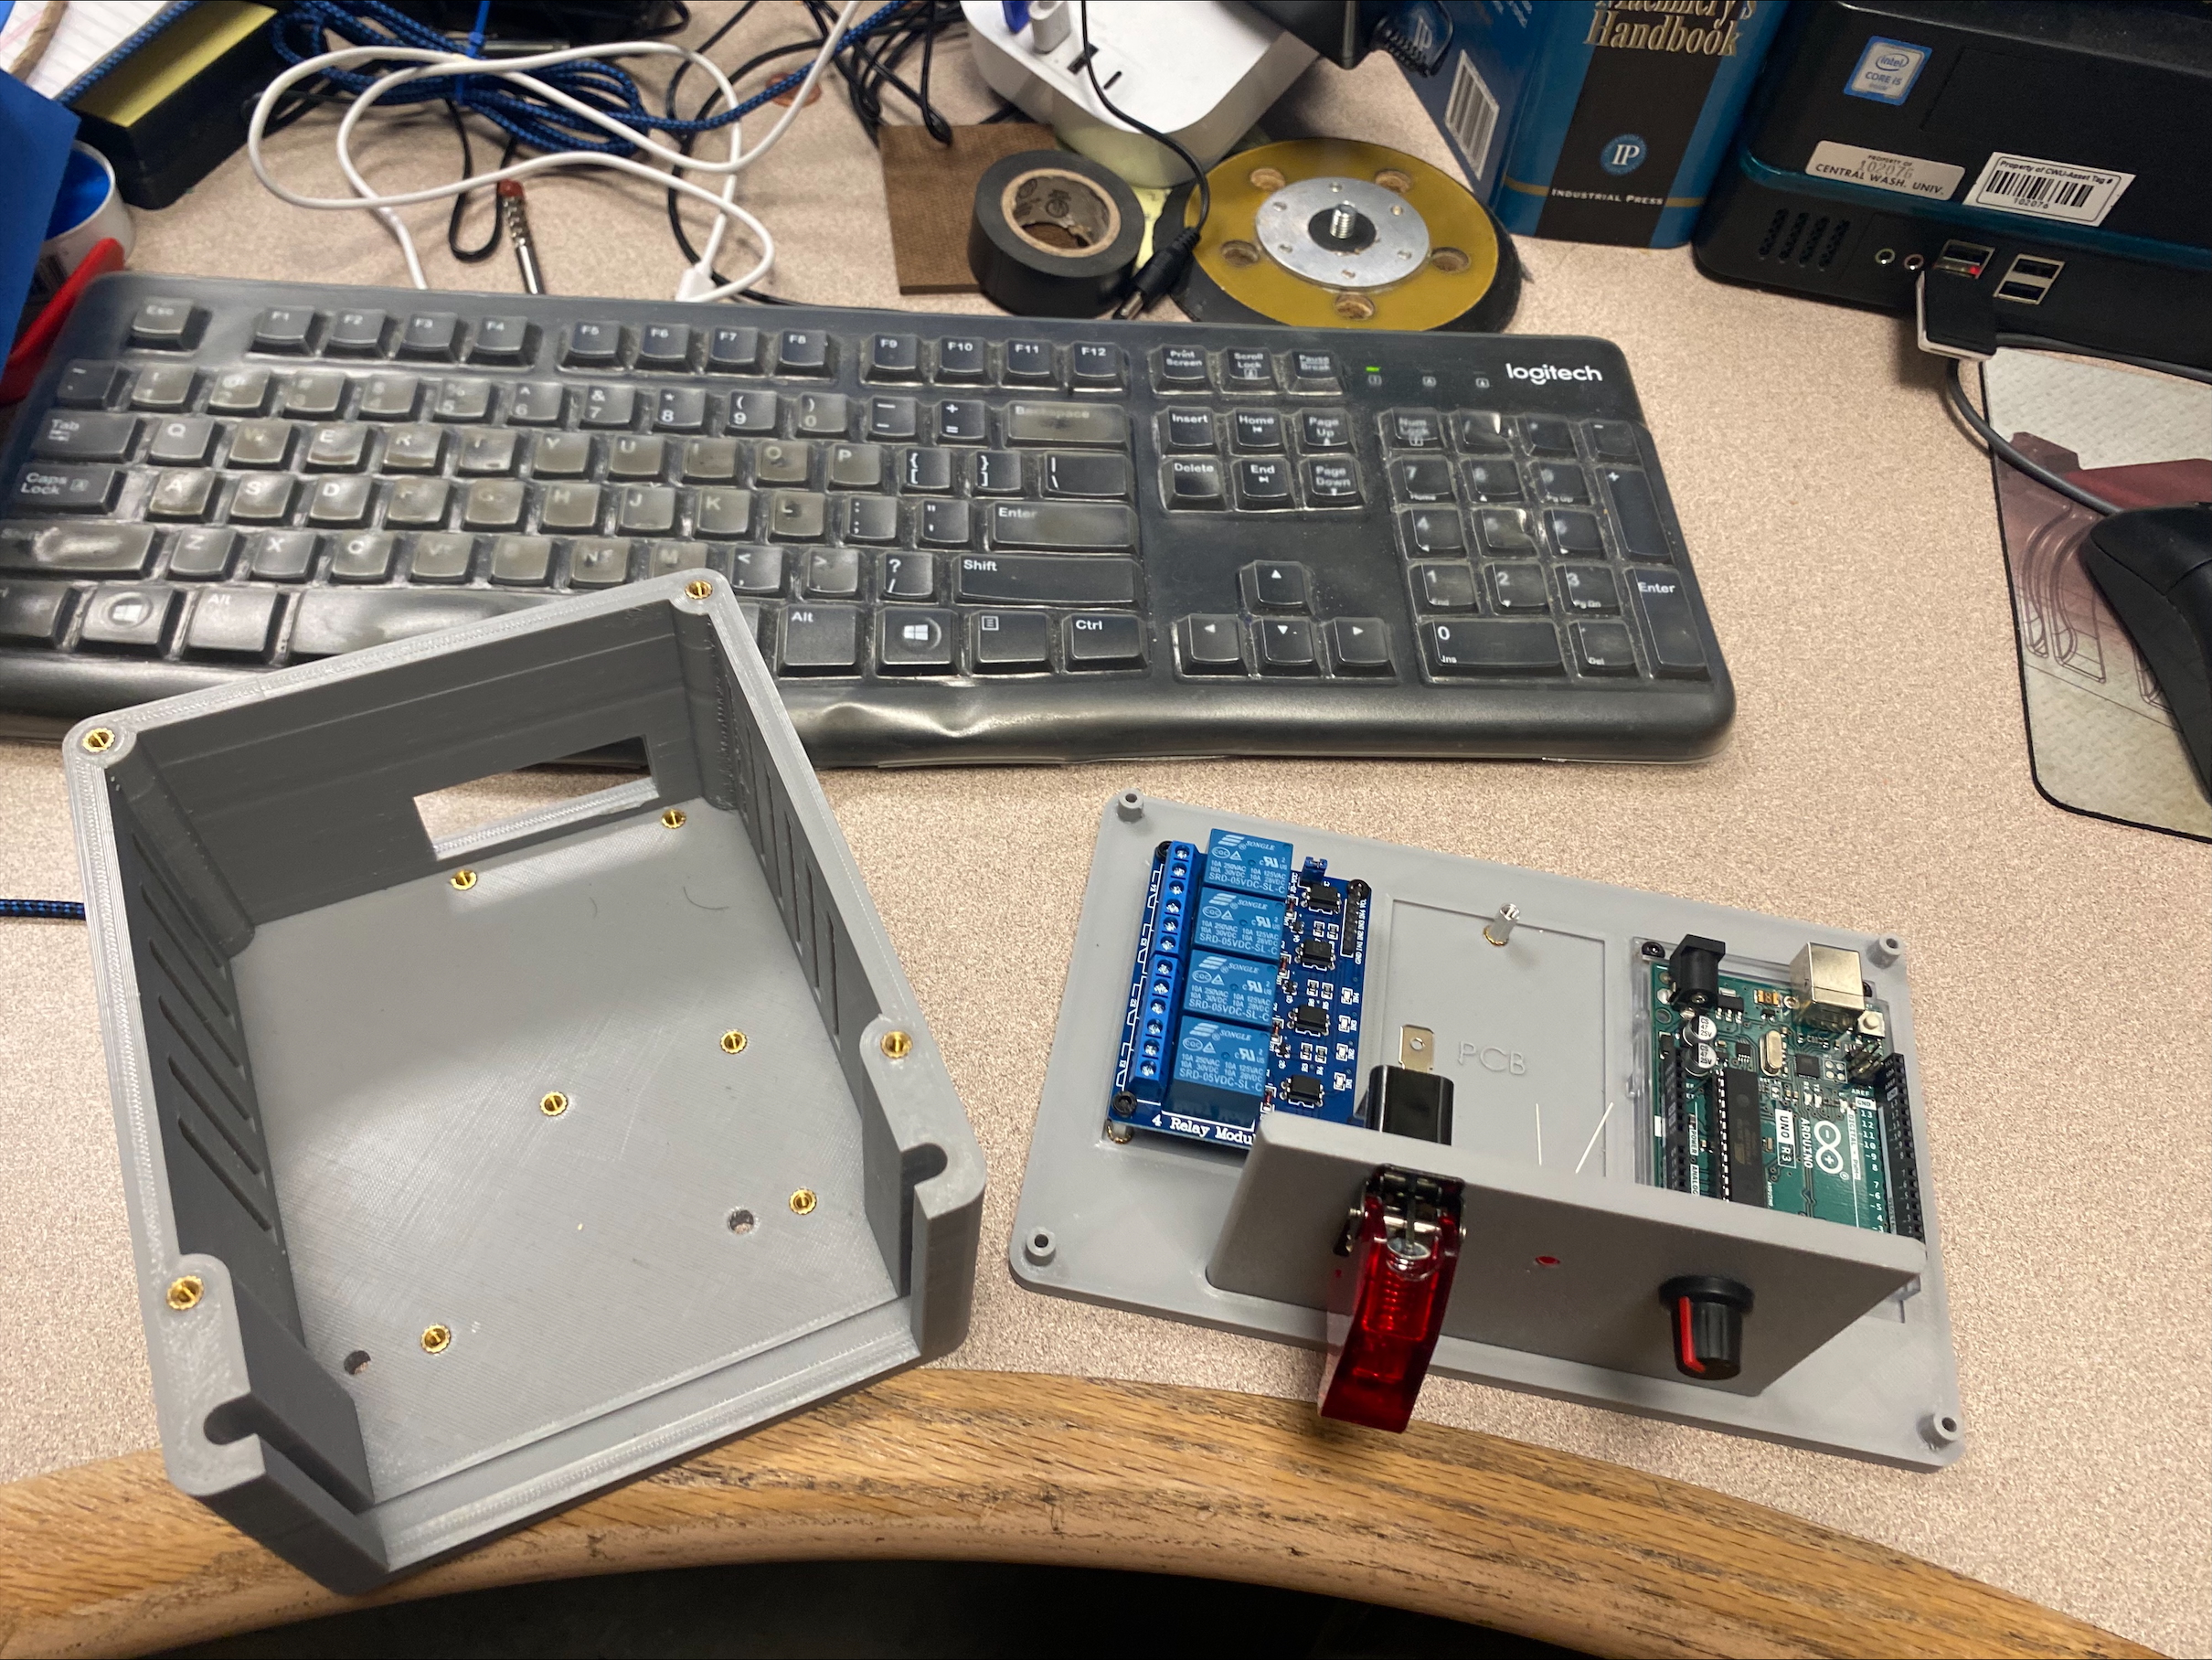
Case design V2 versus V3. V3 features a removable wall for easier access and wiring, but retains a similar front panel. V3 is an inch shorter but 2.75 inches wider.
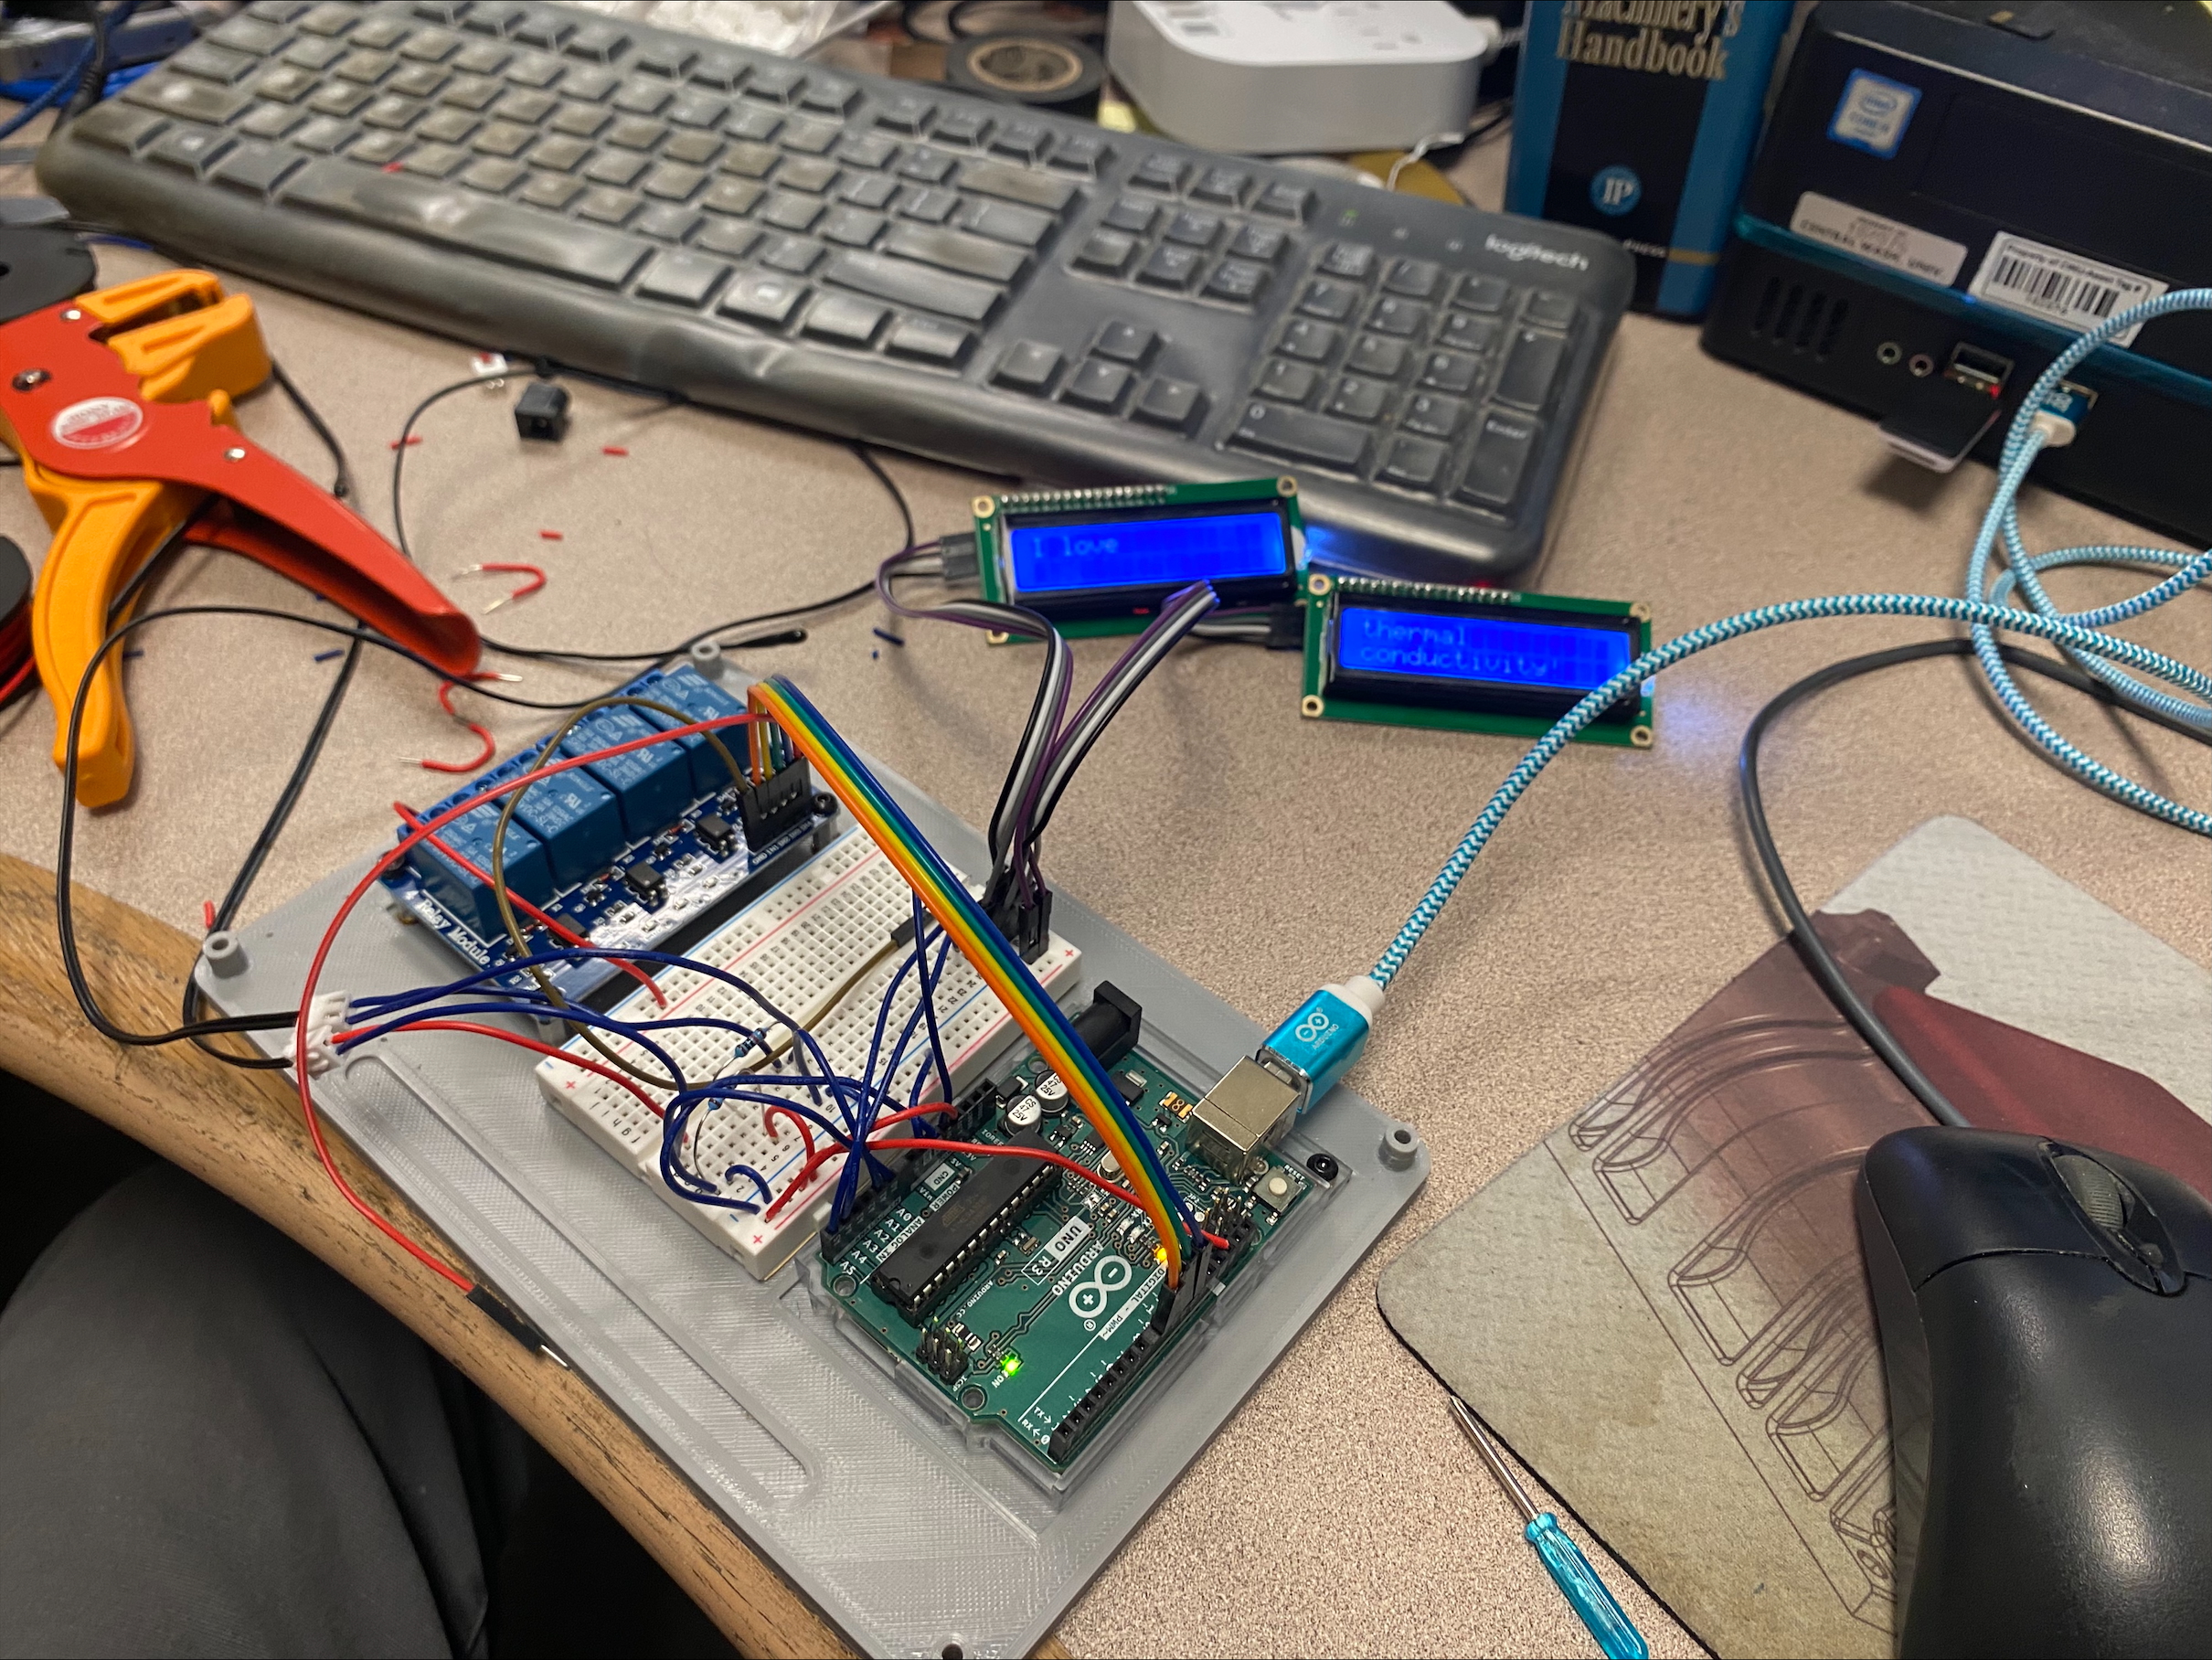
Testing I2C LCD screens. Compared to normal LCDs, I2C screens use the same ports, but have individual “addresses” which the Arduino can use to differentiate when sending data. This allows for much simpler wiring and coding.
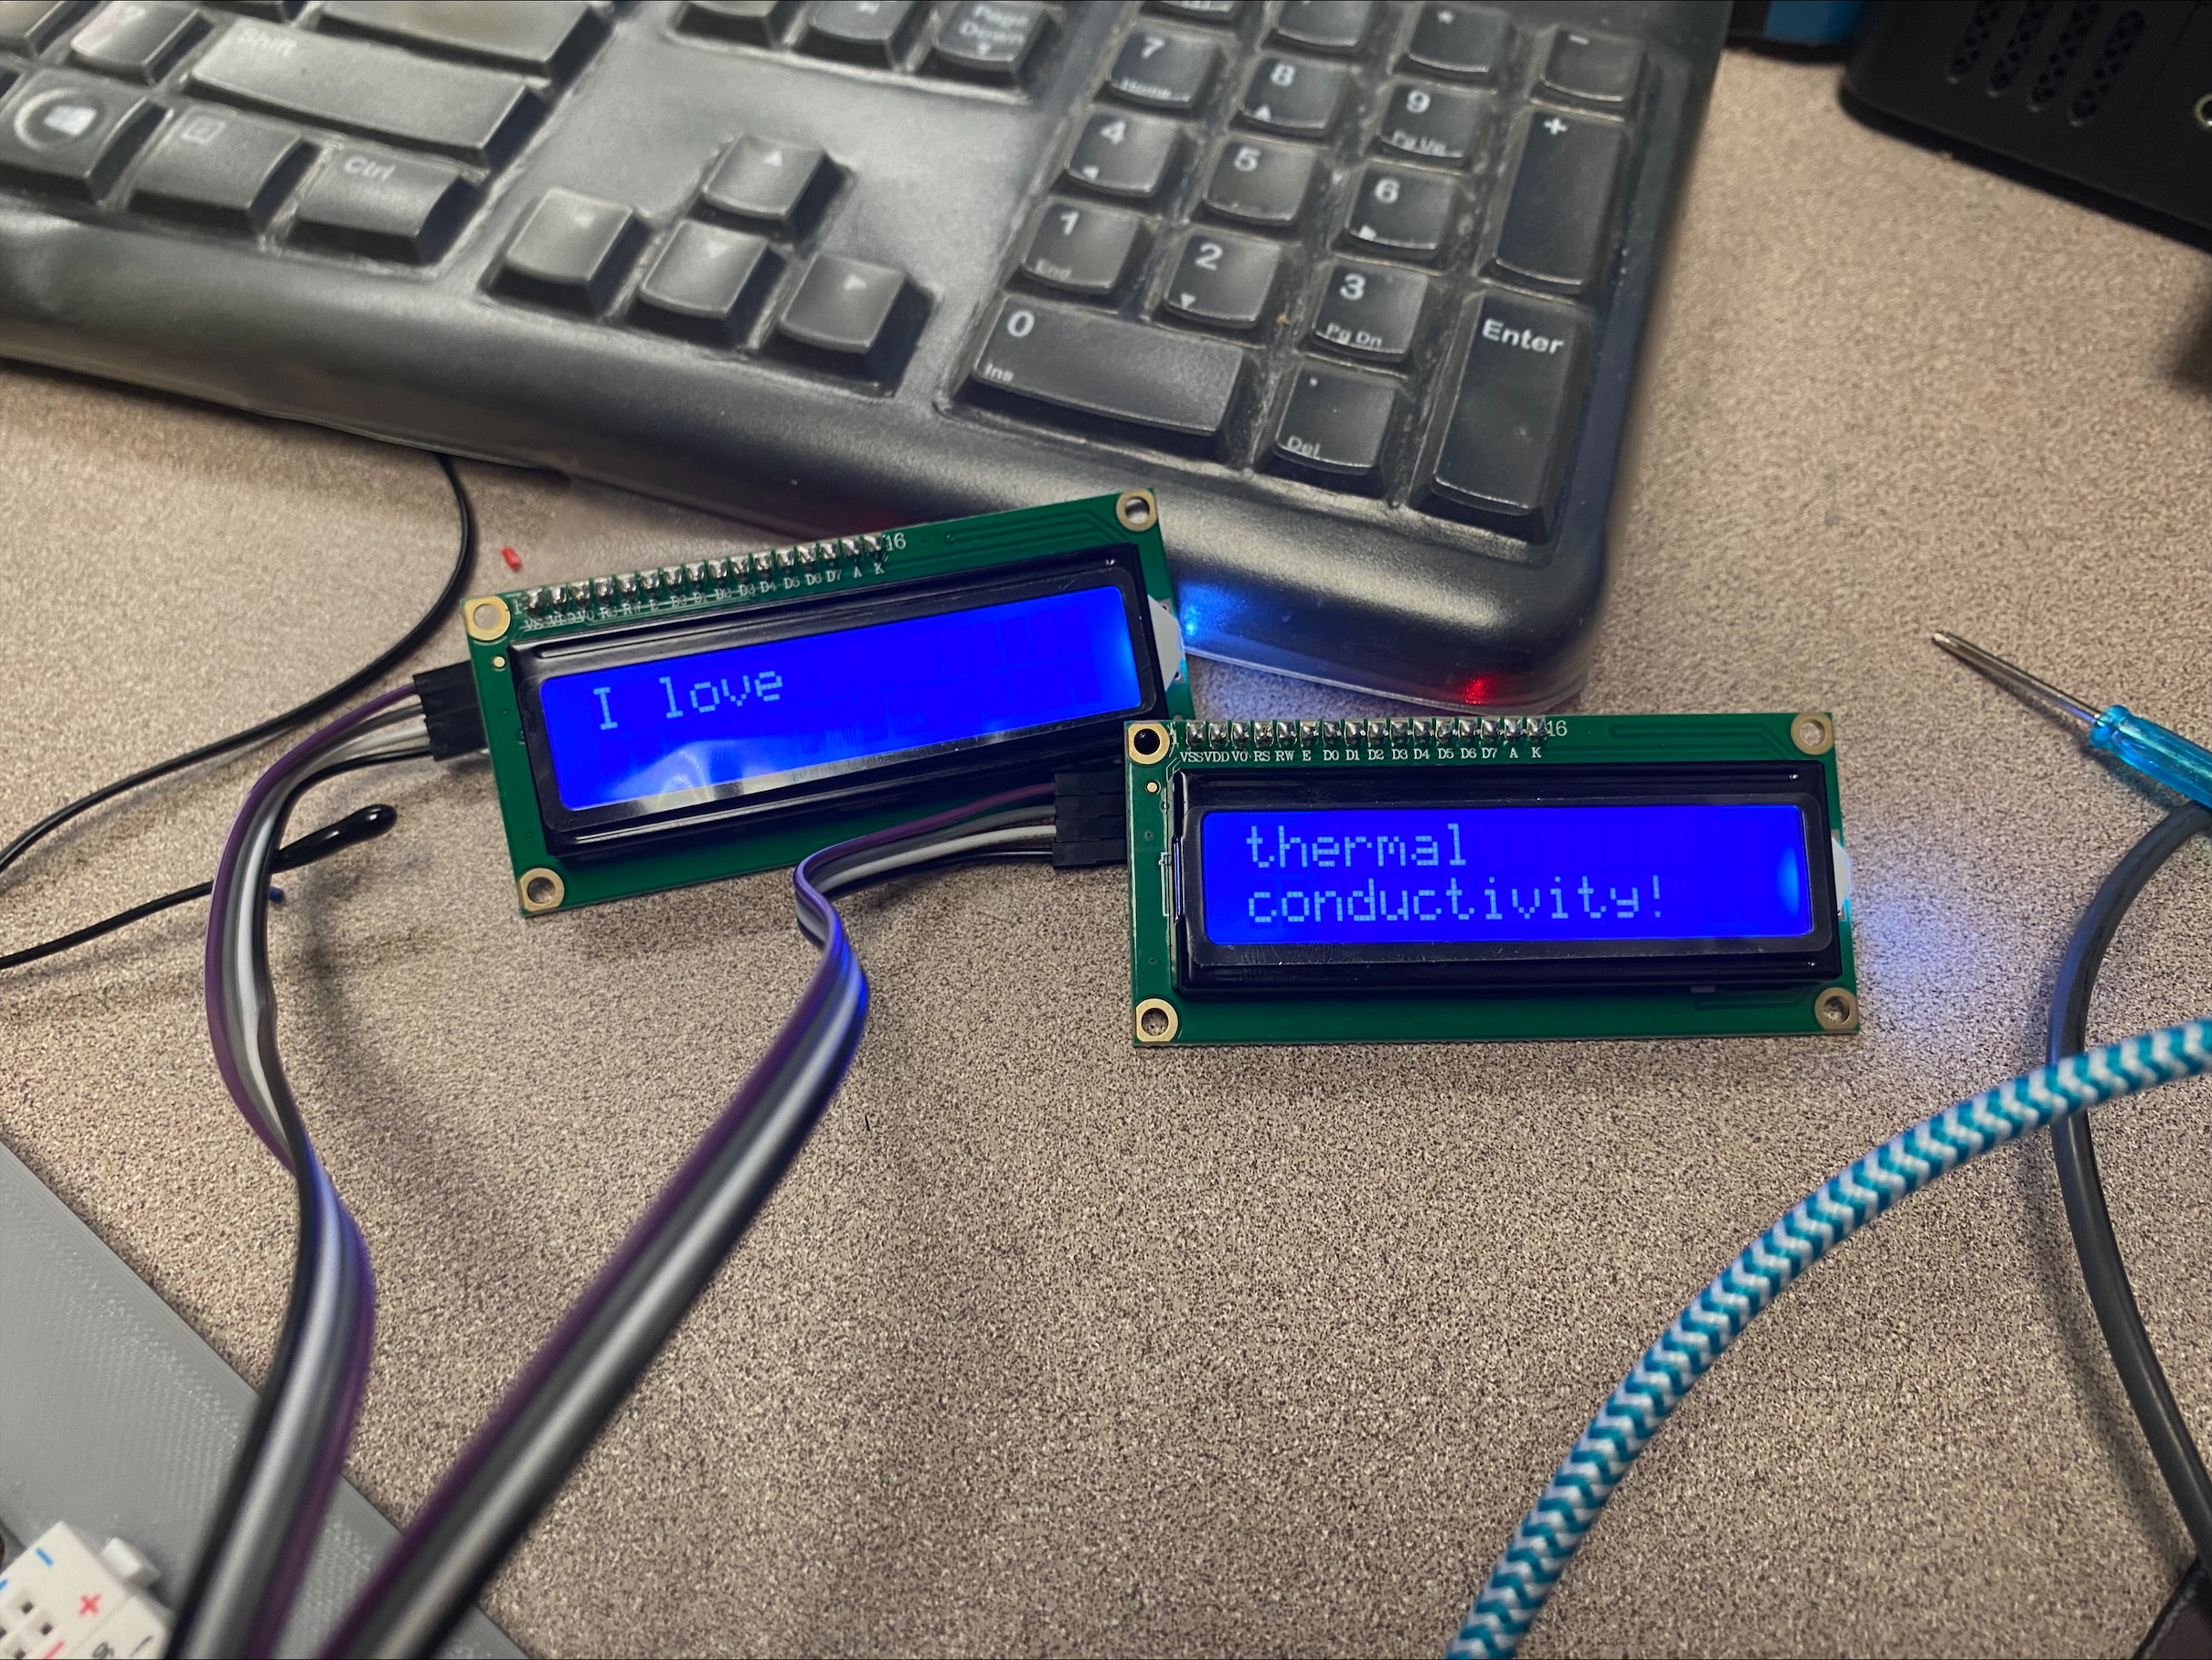
Example of how the LCDs will be used to display text.
Time-lapse of a portion of the time spent coding the Arduino. Most of the time was spent researching how to code, since the Arduino uses a simplified version of C++ and I am only familiar with block-based programming. Towards the end you can see lights blinking on the relay; this is from code which pulsed power to the relay to test it’s function.
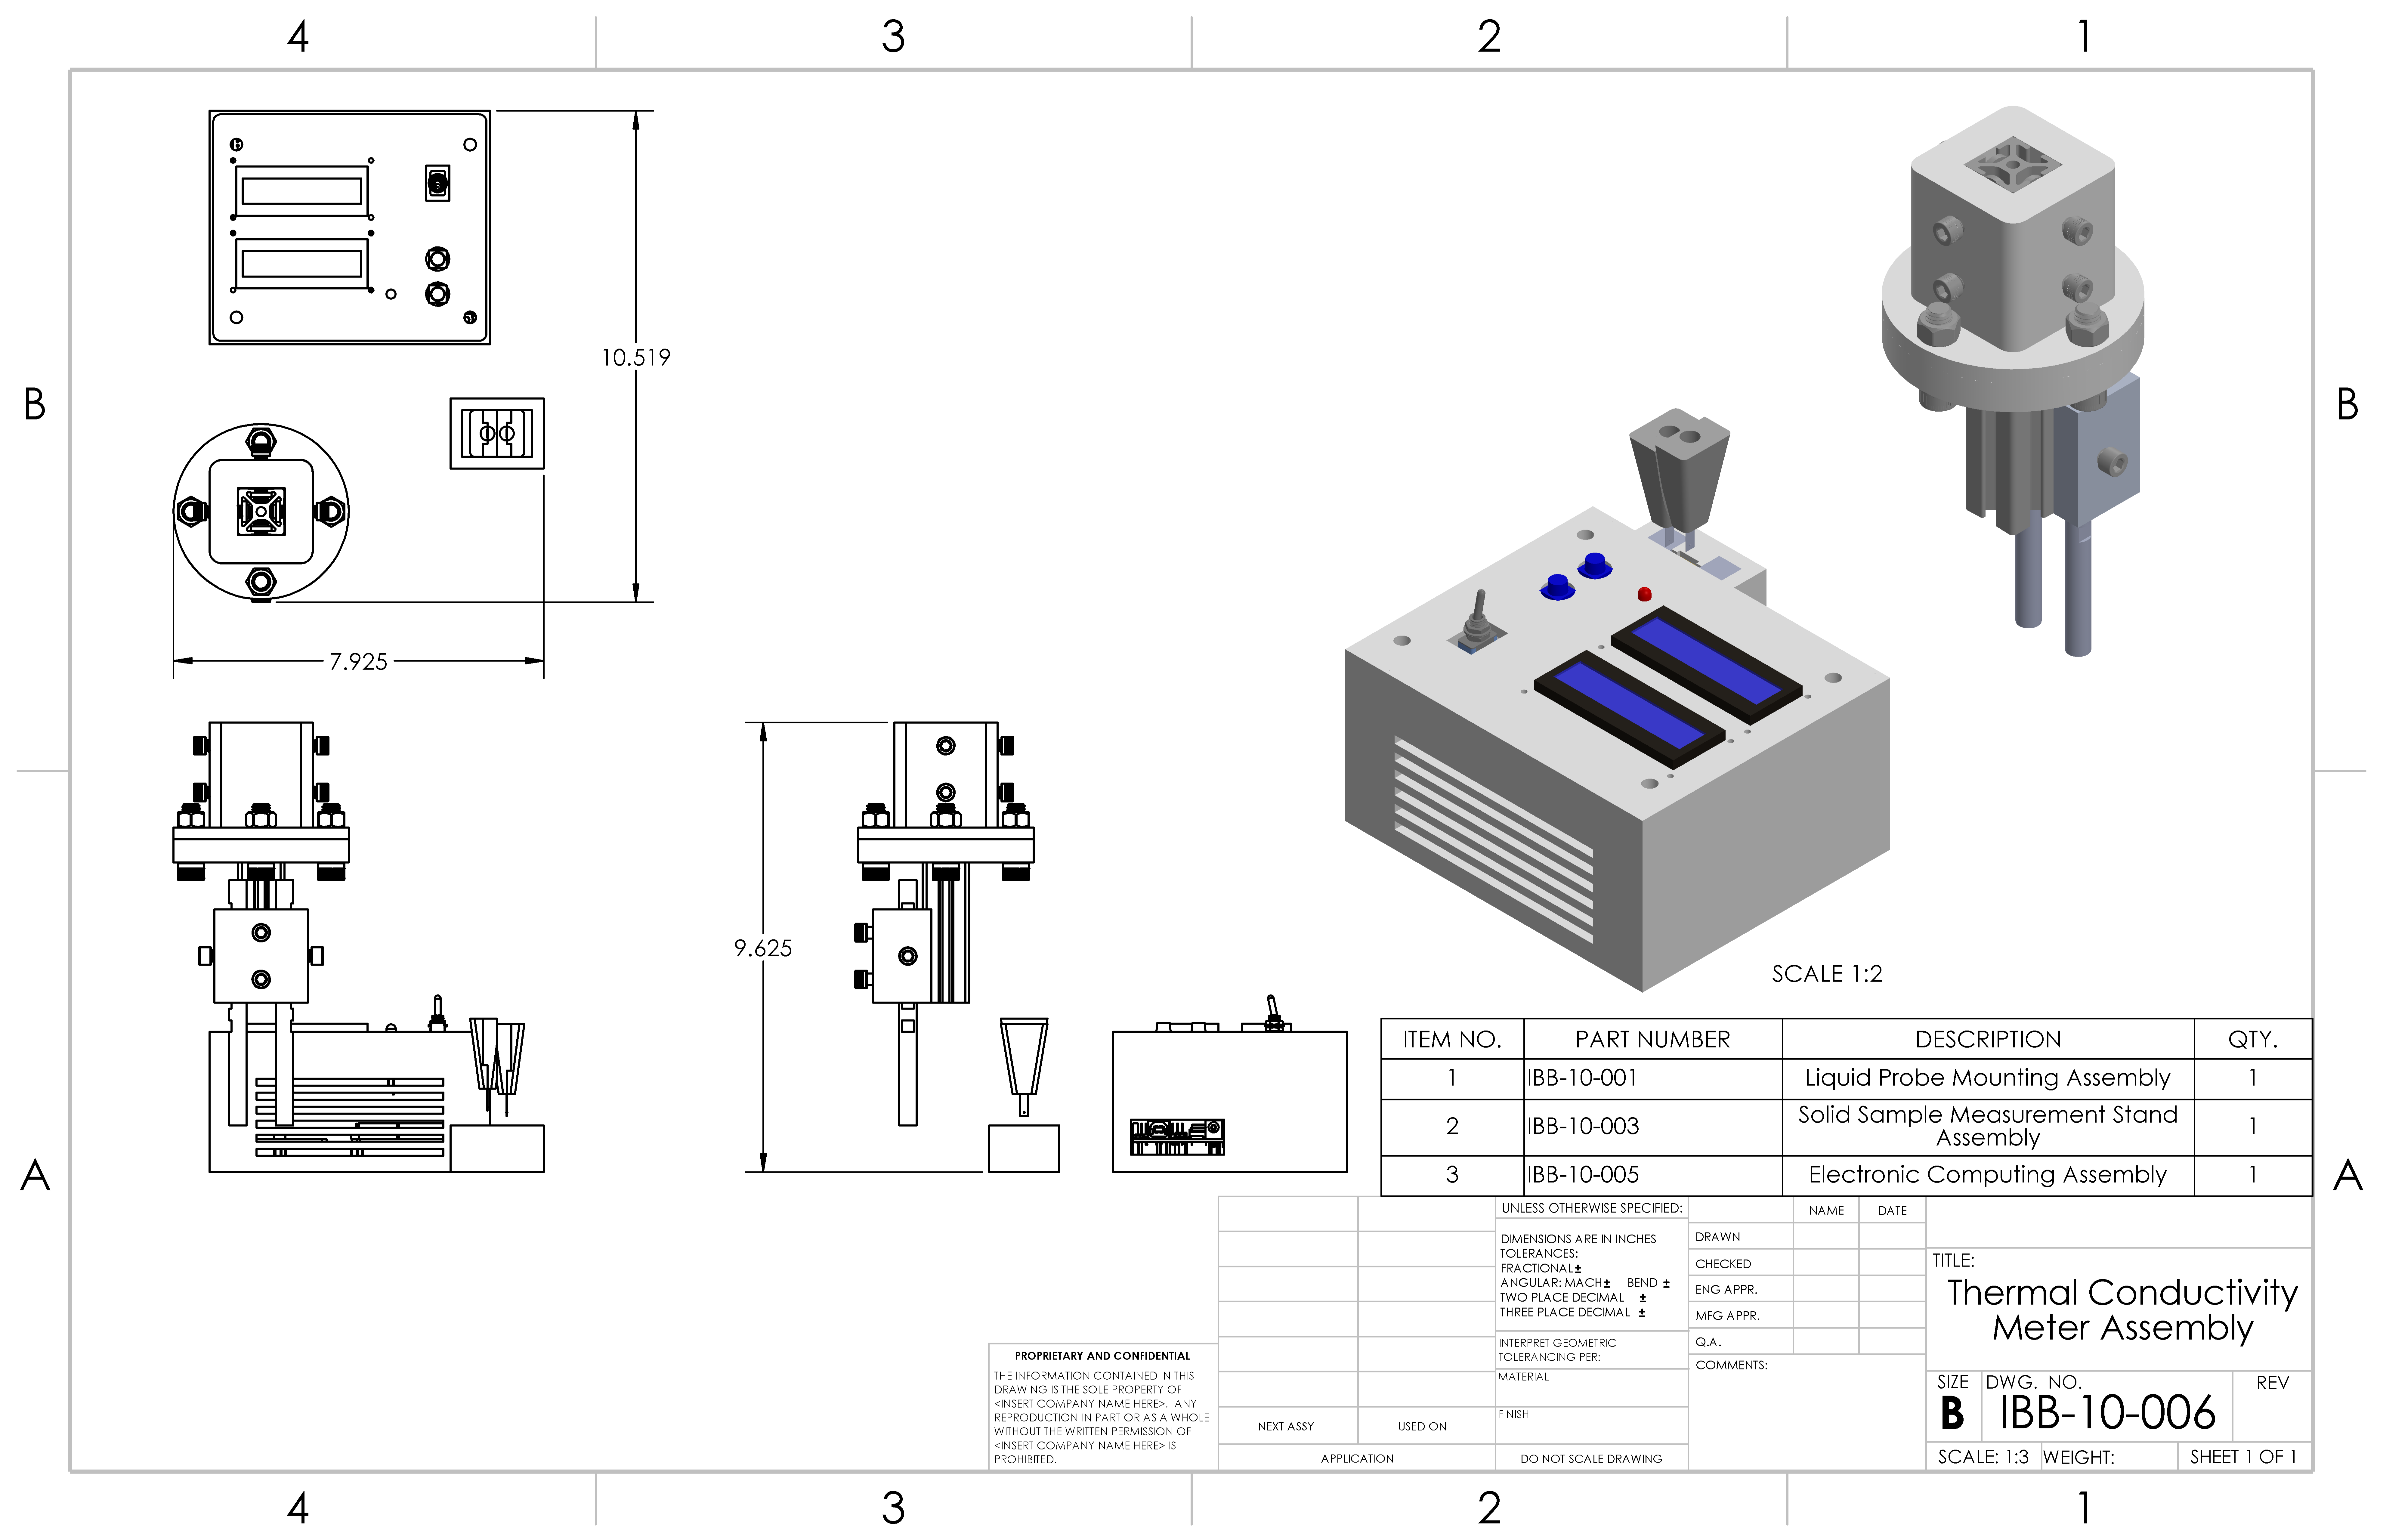
Thermal Conductivity Meter Assembly, Fall 2025 revision
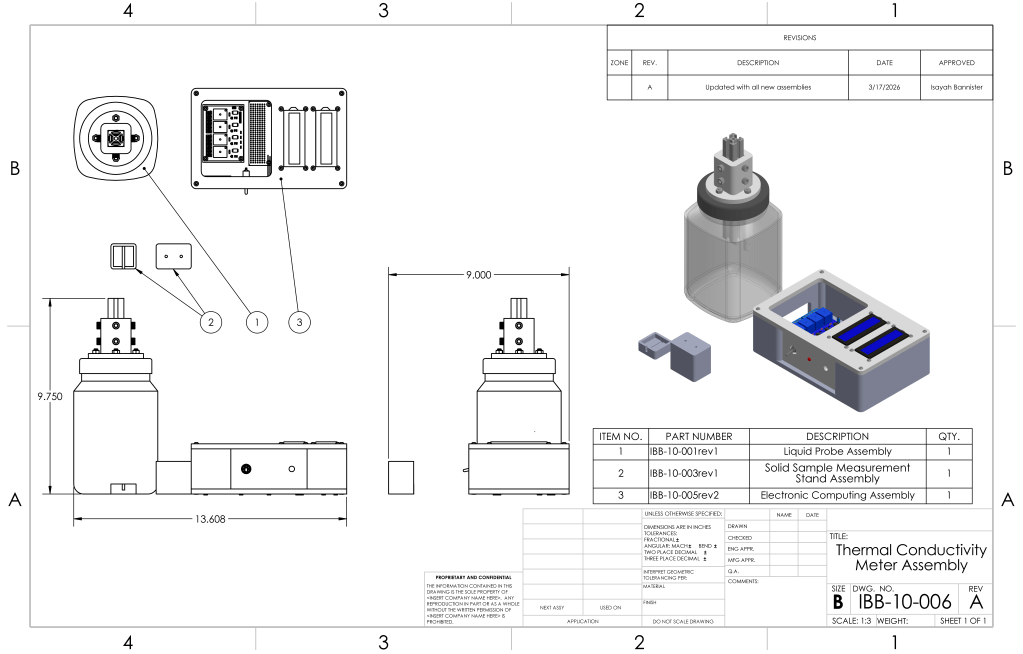
Thermal Conductivity Meter Assembly, Winter 2026 revision
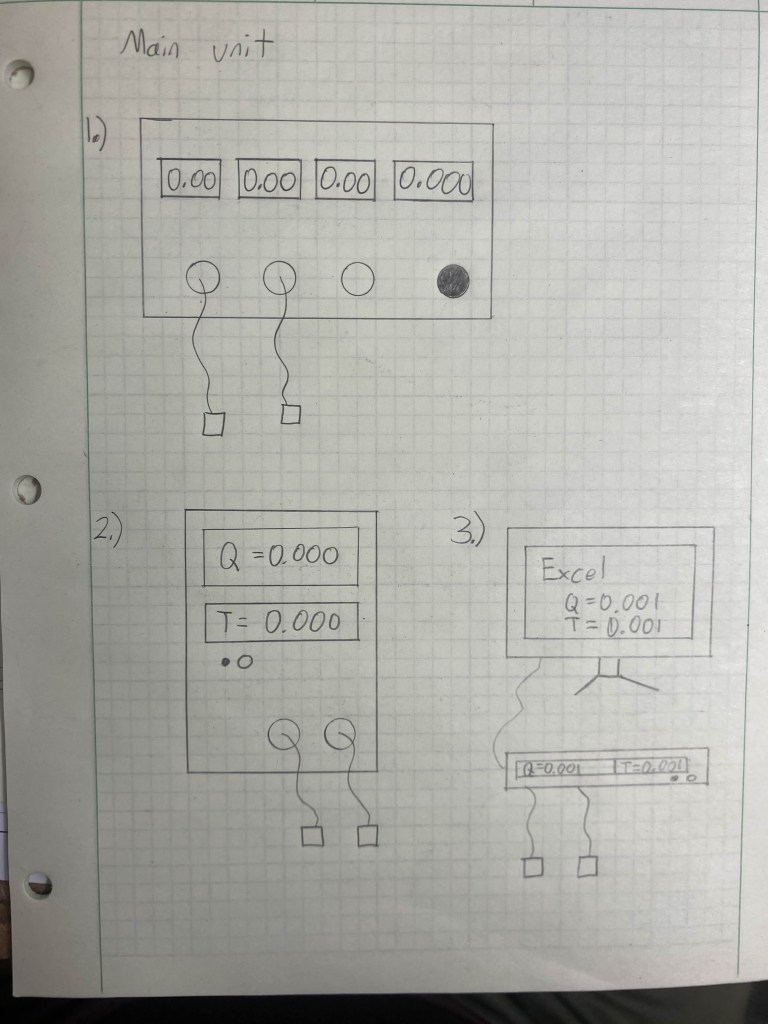
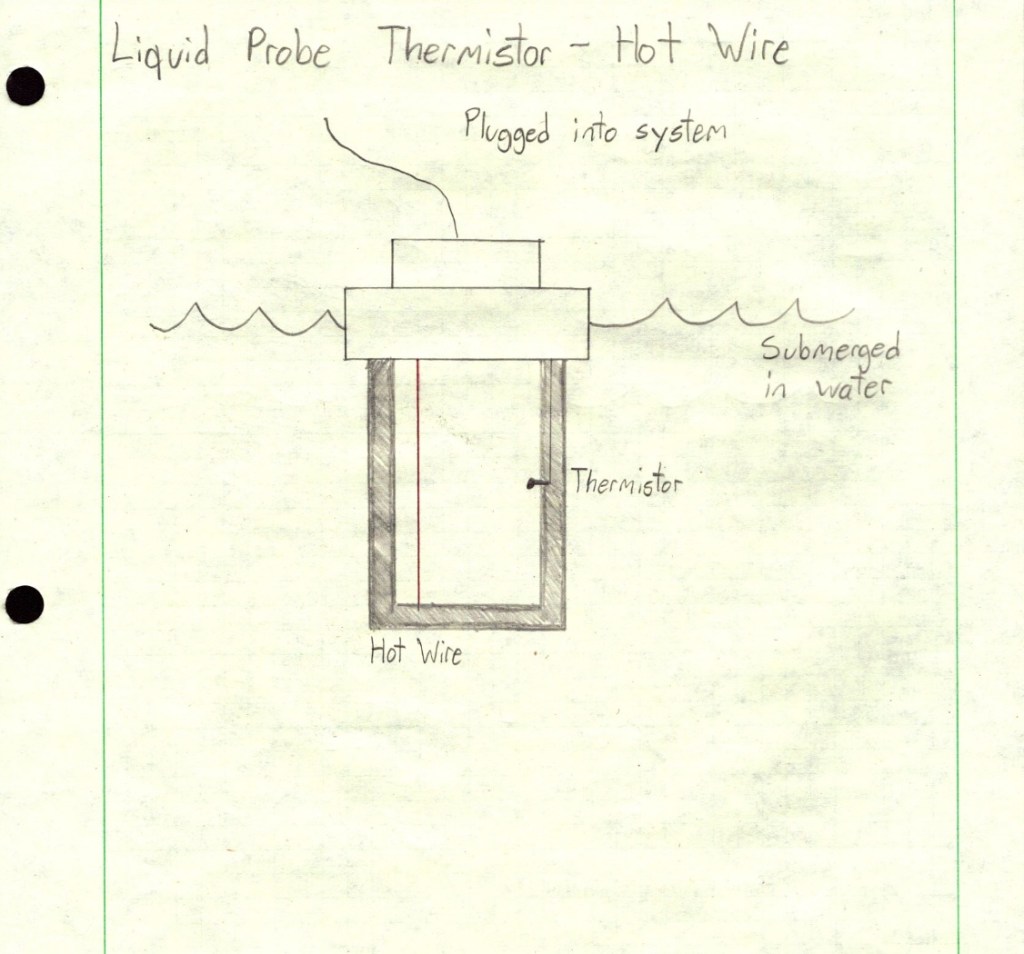
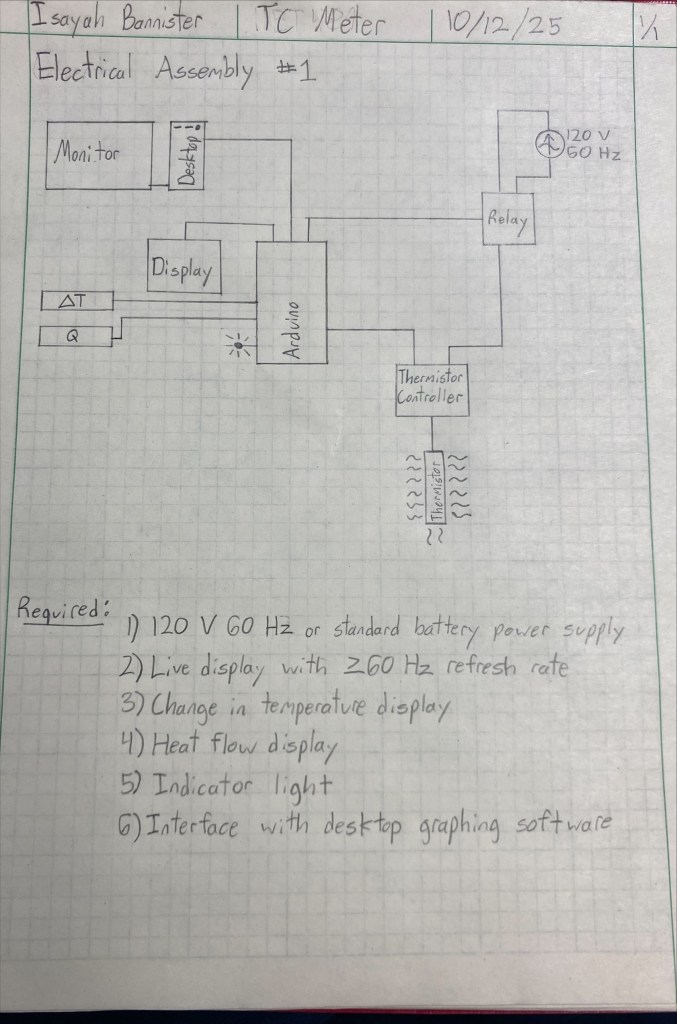
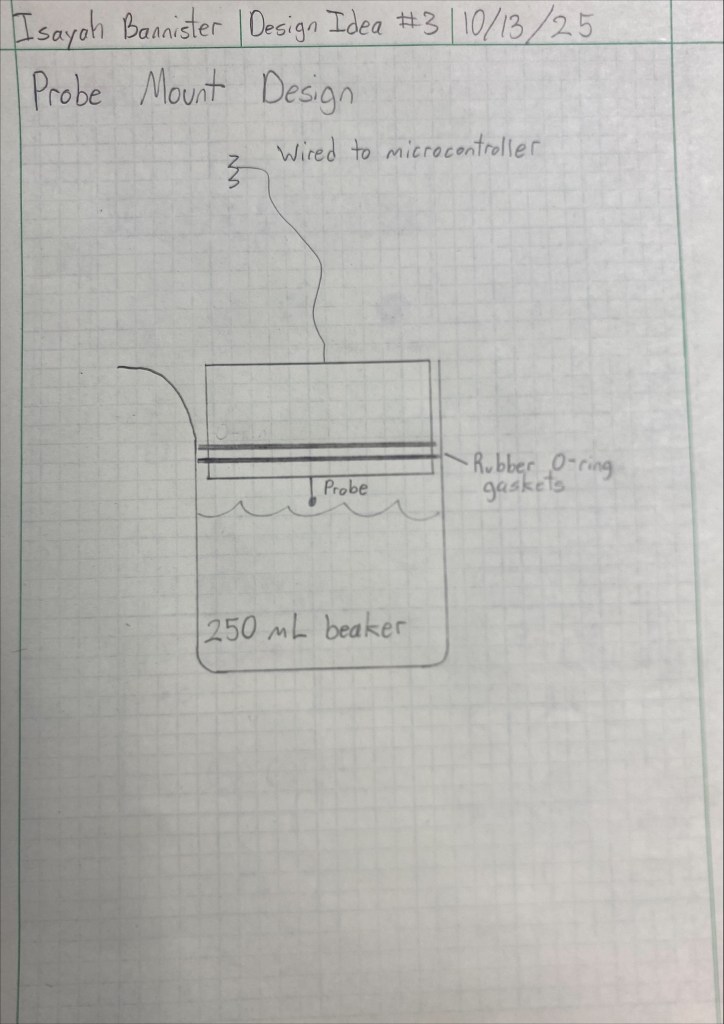
Original Design Concepts

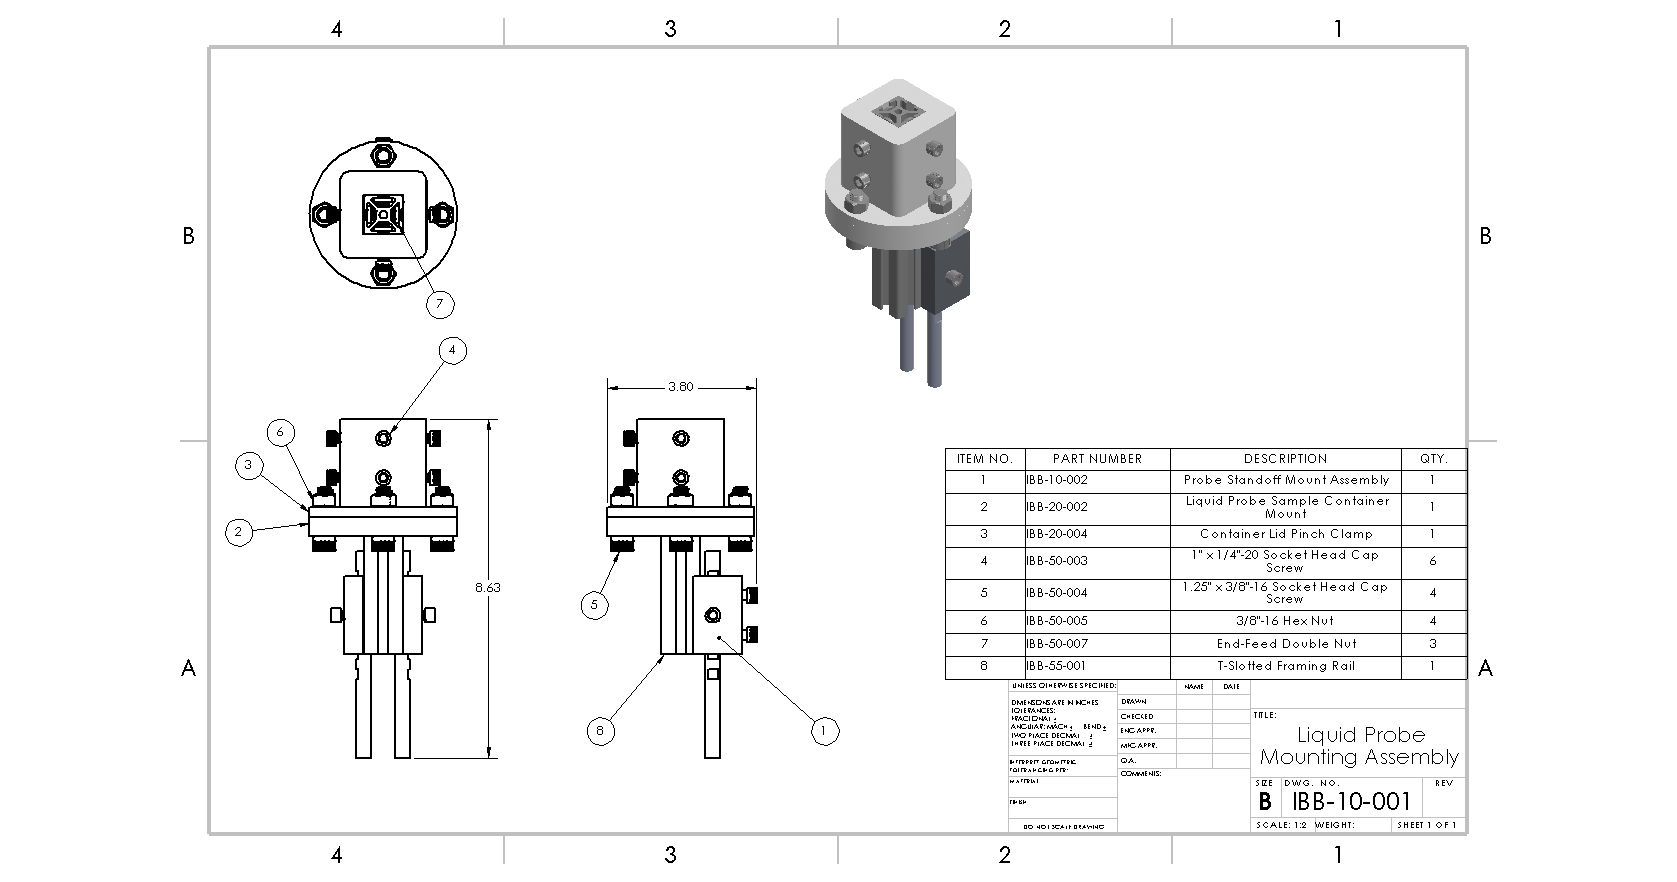


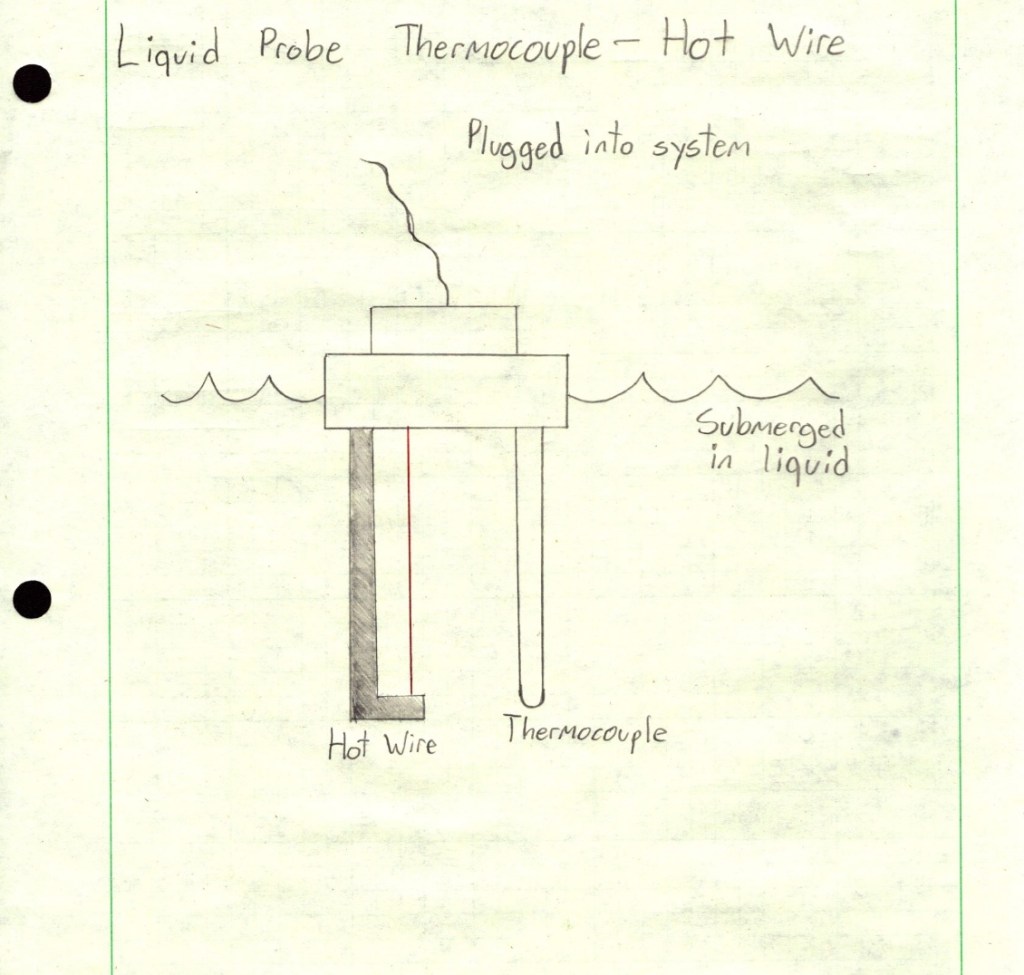
Liquid Probe Drawing Files


Solid Probe Drawing Files


Computing System Drawing Files
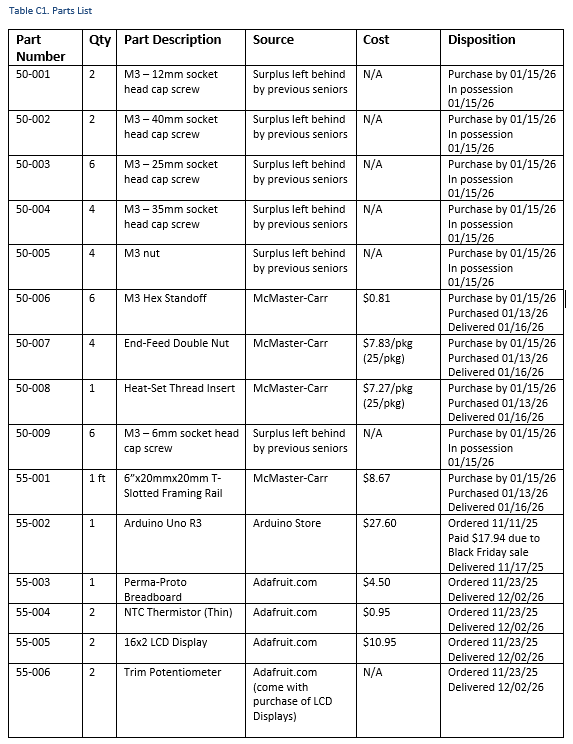
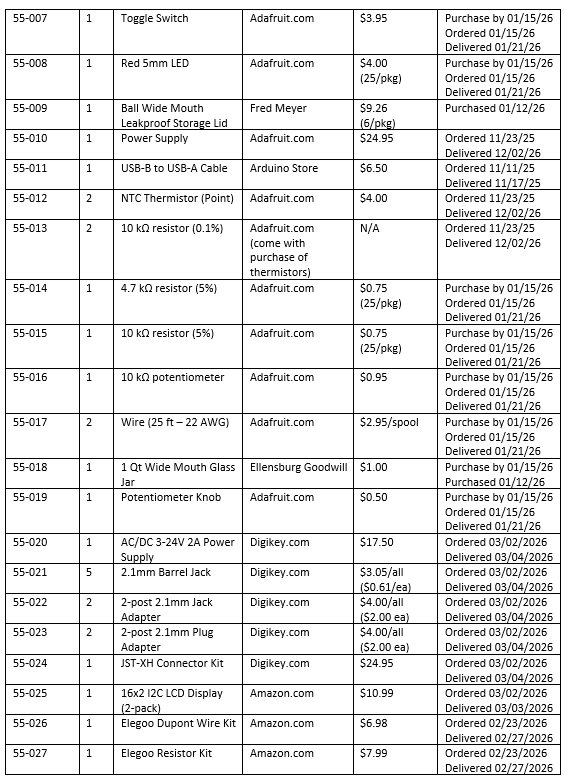
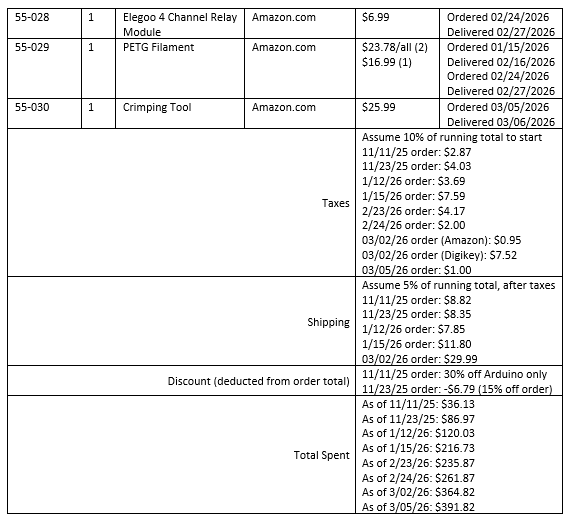
Parts List
Table C1